Top wing
I started with building the top wing then the bottom wing, and included some picture and comments as I progressed with this first step. I followed the exact same process when building the bottom wing.
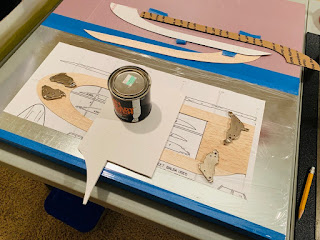
For each wing I traced and cut the set of four LE and four TE sheeting according templates. I made the templates out of packaging cardboard. The top-wing templates are visible in top right of this picture. The bottom sheeting (3 pieces) of each wing panel include the LE, TE, and wing root sheet that I glued together to form a single piece.
Complete wing ready for sanding.
I am fairly happy with the results. The instructions for constructing the wing were a bit vague, but after rereading them carefully it was apparent that I missed an important point: the bottom sheet of a wing panel must be firmly pinned to a flat surface while the top sheet is glue on. I managed to develop a small warp in the wing tips because when the top sheet dried it pulled the wing tips up a bit. This will not be an issue to fix, but I could have avoided it in the first place.
Anyway, I'll start the bottom wing and this time I'll change the build process a bit. First, I will remember to pin the bottom sheet down while gluing on the top sheet. Second, I am going to glue the top sheet in sections: LE, TE, then wing root. I'll be fitting each section into place individually, holding them magnetically, instead of gluing it as one piece held with clothes pins.


Comments
Post a Comment